Friday, June 1, 2012

The Rented Garden, Continued

by Kelly

More pictures from the rented garden:

I saw a Baltimore Oriole (the bird, not the baseball player) for the first time, but didn't have my camera, so I used a picture I found at the Cornell University Bird Identifier site.  Pretty, isn't he?
 

CornellLab Ornithology


grape vines
Apparently grape vines have to be fertilized with fruit rinds and the like, because around the roots of these plants are little piles of fruit scraps, left by the owners of the property. Who knew?

Let's take a walk down this beautiful lane of trees and see what we can find...


Did I mention that the backyard looks onto the river?


I'd better keep my distance, since I can't swim. Luckily, there's a life preserver nearby...


And, to go with the enormous old oak in the front yard, a whole group of enormous old cedars in the back yard.


Such an amazing place.

Meanwhile, more roses are blooming back at our own house and my husband was sweet enough to brave the thorns and bring me a sampling.


This is officially called a 'Seven Sisters' rose, because the tiny blooms appear in bunches of seven. My husband renamed ours 'The Bi***', because it always turns its thorns against him if he gets too close. So although the Seven Sisters doesn't smell as sweet as our yellow roses, it does have attitude, which I find just as appealing. And yes, the rose has bitten me, too. I have special leather gloves gauntlets that I use for pruning it.

Monday, May 28, 2012

FInished Shawl

by Kelly

Here's the finished shawl from a previous post...


This was really fun and easy until the last ten rows, which really dragged. But I did this continuously over a two day span, so maybe I was just burned out.

Friday, May 25, 2012

The Rented Garden

by Kelly

As promised, some pictures of the garden at the house we are renting.

Sweet William


Spiderwort
enormous oak tree


dragonfly - there were an awful lot of these, all identical

Dame's Rocket


Yes, that's our cat on a leash. He was an indoor/outdoor cat at our old house, and doesn't understand why he can't go outside now. I've tried to explain that he might get lost so far from his old digs, and there's this dangerous highway practically in the front yard, but he just looked more sad and pitiful. It's almost like he doesn't understand English or something.

So we taught him how to walk on a lead. Luckily there aren't any other cats around here to laugh at him for acting like a dog. I, on the other hand, have been on the receiving end of a lot of curious looks from the neighbors, who are no doubt wondering what kind of weirdos have moved in next door to them.

And even though he's an older cat, he took to learning a new trick surprisingly well, (except for the first few attempts, where he flattened himself on the ground and was as hard to move as an Occupy Wall Street protester) and he seems reasonably happy about the whole thing.


That's his happy face. Honestly.

Wednesday, May 23, 2012

Square Foot Gardening in Action

                                               Peas, Shallots, Spinach and Sprouting Basil
                                                                        The Tomatoes
                                                                   Up Close Spinach
                                                                     The Long View

The Square Foot Garden is up and producing. We've already harvested radishes, lettuce and spinach and just planted the hot weather crops last week - tomatoes, basil and peppers. I have to admit I am a farm girl at heart, despite my big city roots. I keep trying to convince my husband that we need to buy a small hobby farm - just enough to sustain the two of us and a house full of assorted animals. I figure having a farm is one way to wrangle that cat I've always wanted out of him. I suspect Dan is a farmer deep down as well - if anything it's in the genes as his Mom (Donna) and Dad are expert gardeners and he does seem to enjoy it once we commit to it. This year we also have two 6x15 foot plots where I work to garden as we like. Saturday we planted 12 tomato plants and Monday we got in the second bed of assorted other stuff - more basil (I truly believe you can never have enough basil or tomatoes), the world's hottest pepper, zucchini, cukes and butternut squash. And I also hope to plant about 30 gladiola bulbs. It's been a blazing week here in the northern midwest - my tomatoes are smiling :) Happy gardening!

Monday, May 21, 2012

Project BudBurst Needs YOU

by Kelly

We're renting, and while I miss the garden I actually made with my own two hands, there are any number of flowering plants here for me to look at. And, since I'm not completely sure what some of them are, I spend a lot of time on the computer, using this plant identifier site.

That's why, when I saw an article about Project BudBurst in my local paper, I signed up right away. After all, it combines science and gardening - how could I refuse?

Project BudBurst is an online project which is tracking climate change and how that is affecting plants across the U.S. Basically, they want to know when certain plants leaf out, flower, seed, and drop their leaves in the fall. The official  word for this is Phenology (not to be confused with Phrenology, which is reading the bumps on someone's head - but if you want to find out if you have the bumps which denote spirituality or marvelousness, click here).

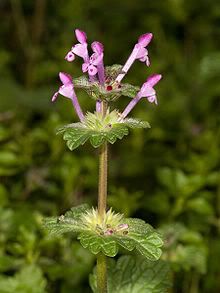
The list of plants they're tracking ranges from common ones like dandelion and lilac to things like Black Locust and Henbit deadnettle (which sounds like a goth band, but is actually quite a girly pink flower). I've signed up to track a few plants, which I would actually be doing anyway every time I walk outside.

Henbit via Wikipedia
Signing up is kind of a chore, since this is science, after all, and they need all sorts of specific information like latitude and longitude and your elevation. The site helps you figure out all this information though, and that can be interesting too, especially when you discover that your particular town is basically located in a great big mud puddle (something you might have suspected for years, but now you will be able to prove that scientifically). And they have an app (yes, there's an app for that) for Android, so it's easy to enter the information.

But if signing up isn't your thing, you can make a 'one time observation'. For example, if the lilacs just bloomed in your front yard, you can visit the BudBurst website and let them know.

Cherry blossoms via The Quilting Sword
This whole idea isn't new, though - the Japanese have been tracking cherry blossom bloom times for years, and they even have a special forecast for this event. For some absolutely stunning cherry blossom pictures, like the one above, pay The Quilting Sword a visit. And by the way, that is the coolest blog name ever. I wish I had thought of it.

So if you've got a bit of a garden, and you've noticed that your flowers are coming up early, why not visit Project BudBurst and let them know? Maybe the planting zones are changing for good, and those of us up here in chilly zone 5 will one day be able to plant all those pretty warm climate flowers. If that's true, it would be nice to know.

 Meanwhile, I'm going out to take pictures of what's blooming today. Flower pictures will be coming soon.

Friday, May 18, 2012

Show and Tell - Baby Blankets and Shawl

by Kelly

New projects - baby blankets to sell.


The bottom blanket is supposed to have ribbon threaded through those eyelets and then tied in a bow. Now if only I had some ribbon.

Also, I've been experimenting with edgings and came up with my very own lace pattern (yay!).


I originally made it up when I was trying to make an edging for another baby blanket that I haven't finished yet, but I don't think this trim is going to work for that. I'd always be afraid of little fingers and toes getting caught in all the lacy holes.

It curls up like that because it's basically a lace ruffle. When stretched out flat it looks even curvier.

I'm selling the edging in the shop here.

And here's the latest project - a shawl that's been a quick crochet so far...


The free pattern for this shawl (called Iris) is at WEBS if you're interested.
The best part is that it's only a two row pattern, which for lace is really amazing. No need for a lifeline here.

Monday, May 14, 2012

Adding a Backing to a Cross-Stitch Bookmark - Tutorial

by Kelly

When I started making cross-stitch bookmarks, I faced a dilemma. As a book lover, I didn't want a bookmark that was too thick, because then it might damage the spine of the book. On the other hand, the stitched bookmark really needed some kind of backing, to cover up the less than pretty back.

After trying quite a few methods, I finally found one that works - adding a ribbon back with double stick fusible webbing. It's super fast and easy and all you need is the bookmark, the webbing, some ribbon, and an iron.
 
First, set your iron to the heat setting recommended on the webbing package. While that's warming up, cut your bookmark, your ribbon, and a piece of the webbing to an identical size.


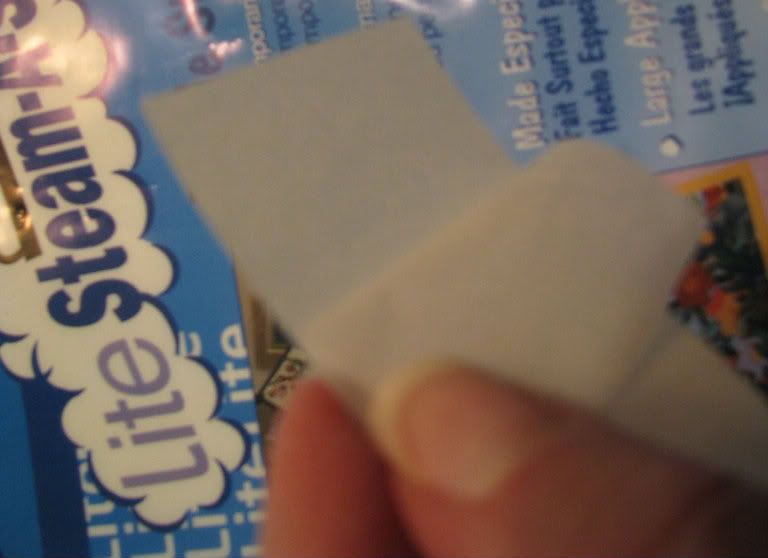
Next, peel off one layer of backing from the webbing. This will expose a layer of sticky stuff.


Place the backing, sticky side down, onto your bookmark and iron lightly. I usually just set the hot iron on the bookmark for a count of four, then lift it off. By the way, if you don't happen to have an ironing board, two layers of bath towels on the kitchen counter works just fine. (At least, for solid surface counter tops.)


Peel the next layer off of the backing. Look, another layer of sticky stuff.


You'll notice that I have two 'seam allowance' side flaps on the bookmark above. This probably isn't necessary - I just like to be sure that the side edges are as sturdy as possible, since they seem to wear out first.

Place the ribbon on the bookmark, making sure the edges are lined up the way you want them, because after the next step, there's no going back.


Now iron again - you'll need to iron a little longer this time, to make sure all those layers are fully adhered.


That's it! You're done.


Looks like I'm going to have to trim that ribbon a little. But that's okay - I don't have to worry about fraying edges, because the webbing acts like glue and holds loose threads together.

Ta-da! All done. Less trouble then sewing, and not as thick or messy as gluing on a piece of felt. And there are miles and miles of pretty ribbon at the craft store, so they're sure to have one that matches your stitching.


Oh, and if you are mistake prone like me, here are a few helpful tips to get you out of the mess...

How to remove fusible webbing

If you make a mistake with your first experiments with fusible webbing, don't freak out. Soak your project in lukewarm water for a few minutes, then use your fingernail or a soft toothbrush to gently scrub away the fusible webbing. Please be aware that I have never tried this with old projects, only new ones, or projects a few days old. I found this out by accident when I tried to clean a completed bookmark.

If you get sticky stuff on your teflon coated iron, let the iron cool and use vinegar and a soft toothbrush to clean it. I got that tip here. Vinegar is cheap and does so many things...I hope nobody gets a patent on the stuff, or we'll be paying an arm and a leg for it.

I've added some bookmarks to the shop. Give them a look here, if you have a second.
Related Posts Plugin for WordPress, Blogger...