Monday, December 31, 2012

Twisted Germans and Snow Falling Softly

by Kelly


"Snow, it won't be long before we'll all be there with snow
Snow, I want to wash my hands, my face and hair with snow"
                                                                           - White Christmas


Well, maybe not that last part. I do love snow, but let's not get carried away, here.


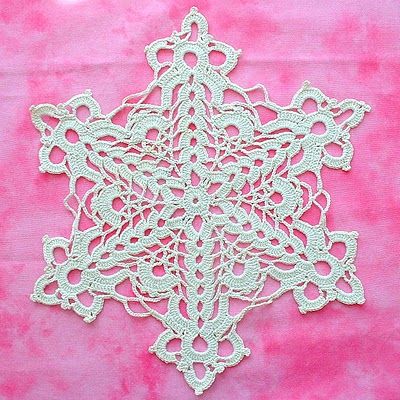
Especially the fluffy white kind of snow that looks like spun sugar. When each tiny, delicate flake is visible, it rewards a closer look. Don't slip!

In other news, I'm working on a special project for my aunt-in-law : leg warmers.

I know what you're thinking. Leg warmers, really? Well if bell-bottoms can come back, why not leg warmers?  And anyway, my aunt-in-law only wants them for a practical purpose - her legs get cold, and she wants to keep them warm. I can only hope that she doesn't set a fashion trend.

Of course, if you're going to leg warmers (or socks or mittens, I suppose) you should really master a flexible or stretchy cast on. The one I've run across most seems to be The Twisted German or Old Norwegian cast on, and neither of those names made me think that this was going to be a simple matter, to learn this new trick. And oh, how right I was.

Have I mentioned that I mostly learn new knitting and crochet techniques by watching YouTube videos? Well, this time, even YouTube failed me. Oh, there were plenty of video tutorials - too many, in fact. And most of them were unclear for various reasons - odd camera angles, too close or too far from the action, or maybe they took for granted that you would know instinctively how much yarn to use for the long tail, or how to wind a cat's cradle of yarn around the thumb and fingers of your left hand.

But then I found How to Knit the Twisted German Cast On by newstitchaday, and I finally saw what I was doing wrong - I wasn't tightening the stitch after getting it onto the needle. Success at last:


And yes, I know that's supposed to be on double pointed needles. I find it really fiddly to cast onto DPN's, so I just cast on with a long regular needle and then transfer the stitches.

So for now, onward with the leg warmer project. Let's hope that we don't have to crack out the dangly earrings next. I'm afraid I've gotten rid of all of mine. Although big hair will not be a problem - I can get that look easily enough with just a little humidity.

Friday, December 28, 2012

Crafty Christmas Swag


by Kelly


I received much crafty swag for Christmas this year:


My early experiments with tatting have shown me that while tatting is simple to do, it's difficult to do beautifully without practice:


And although we didn't have a white Christmas here, beautiful fluffy white flakes are now falling.


New Year's Eve is fast approaching. Resolution time. I resolve to be happier with the things I have, and less driven to change the things I can do nothing about. In fact, that may be my permanent resolution.

Monday, December 24, 2012

Mitten Tree Contributions!

by Kelly

Merry Christmas Eve! Best wishes for a happy holiday. Best wishes even for those who are gathered on a beach in sunnier climes, watching a parade of decorated boats. Actually, no - pooh on you.

In other news, the Mitten Tree contributions have been delivered! Just in time for cold and snowy weather.


The heap seems to be about the same size as last year...


Yay for warm hands and heads! And surprisingly, our contributions were supposed to be distributed just before Christmas break, so the kids will have something to wear when they're outside playing in the snow. If there is more than a dusting of snow, that is. And do kids even play outside anymore, or do they spend most of their time snuggled up near a warm Internet connection?

Oh well, it's the thought that counts, right?

And speaking of thoughts, best wishes to all for a happy holiday. May the next year be merry and bright. Fingers crossed.

Friday, December 21, 2012

End of the World Calendar Shopping

by Kelly

So as you can see, the world didn't end after all (or at least, not yet), which means that now I have to go shopping for a calendar. As usually happens, we have 'inherited' three calendars already, but these calendars really don't suit us, for various reasons. Hand me down calendars rarely do, am I right?

So first up is this one, which doesn't have anything to do with crafting. I would only go with this calendar because my husband calls this 'the alien dog' and that's perfect for an 'end of the world' mindset.

via Amazon

I do agree with my husband, by the way - that dog has a suspiciously large cranium to be just an ordinary household pet. Admittedly, it's terribly cute, but can you really trust it not to be part of an alien incursion force?

Then there's this one, which doesn't involve a craft that I can actually do but is too beautiful to pass up:

via Amazon

I could hang this on our wall and be plagued with guilt that I haven't taken any steps to broaden my crafting horizons beyond window shopping for pretty fabrics.

Then there is this one, which involves a craft that I do know:

via Amazon


But I already have a full agenda of knitting/crochet projects planned, so do I really need more projects? Ahh...no.

For sheer eye-candy, though, this is my favorite:

via Skein Queen

Gorgeous, right? Limited supply only, so act soon....

The one I was really leaning towards is this unravelling scarf calendar. Until I saw the price, that is. I think fifty-nine dollars is a bit steep for a calendar. Admittedly I would use it every day, and it is multi-functional, but still...

via Generate
Pull on a thread and the day unravels...very nice. WHY didn't I think of that?
I found this via 1 Design per Day, which has lots of cool calendars that you should really check out, including one that uses bubble wrap.

So the search goes on. Luckily I have plenty of time, seeing as how the world didn't end after all.

via Amazon

Maybe I'll just save myself some money and use the night sky as my calendar. Hey, it worked for the Mayans. The more things change, the more things stay the same, right? Sometimes they even come full circle.

Monday, December 17, 2012

Mickey and Minnie Mouse Christmas Ornament Pattern

by Kelly

Sorry for the brief hiatus - it's been a very busy week here. But I did find time to  make some cookie ornaments.


These are super easy and very durable. So durable they might even be pet proof, although pets will certainly try to eat them. I used this easy recipe from allrecipes, which is my goto online recipe book. If you'd like to make these cookies water proof for outdoor use, I'd suggest spraying or painting them with some kind of polycrylic sealer (the kind you find at the hardware store). Speaking from experience, they do tend to dissolve easily if they get wet (for example, if you happen to knock over your morning beverage on the counter where they are lying), and there's nothing sadder than a soggy cookie ornament.

And if you don't have time to make your own, they're available in our shop for a limited time.

I also crocheted some cute Mickey and Minnie Mouse ornaments for the tree.  These are very simple and take about three minutes each, so they're perfect if you need a last minute stocking stuffer.


This is a free pattern, and if you wish to make these for your own use please feel free. You can not reproduce this pattern in any part for profit, or claim it as your own.


Mickey and Minnie Mouse Christmas Ornaments


Materials:
Black worsted weight yarn
size G crochet hook

optional: 1" wide fabric ribbon (I used red with white dots) and red sewing thread.

Gauge isn't super critical for these. You can easily adjust the size by using different yarn or hooks. Mine came in at about 5" (measured across both ears).

Pattern:

Main head (make one)

1. Make a magic ring and sc 6 into the center.  Pull tight and mark your first stitch (I use a paper clip). Ch 1.

2. Work 2 sc into each stitch around to your marker and join with a slip stitch. Ch 1.

3. *Sc into first stitch, work 2 sc in next stitch. Repeat from * around to your marker and join. Ch 1.

4. *Sc in first two stitches, work 2 sc in next stitch. Repeat from * around to your marker and join. Cut yarn end and fasten off.

Ears (make two)

1. Make a magic ring and sc 6 into the center. Pull tight to join and mark your first stitch. Ch 1.

2. Work 2 sc into each stitch around to end. Join with a slip stitch, cut yarn end and fasten off.

Sew ears to head (with yarn or black sewing thread) through two or three stitches only. This will help your ornament look like Mickey or Minnie, and not a teddy bear.

Optional: Make Minnie's hair bow.

Cut about a 5" length of ribbon. Fold a flat bow with your ribbon and sew it to Minnie's head with red sewing thread. You could use black thread, but I found it showed up against the red ribbon, while red thread disappeared into the black yarn. For a great tutorial on how to fold flat ribbon bows, check out this YouTube video.

That's it, you're done! Add a hanger of some kind and add it to your Christmas tree to proudly show your love of all things Mickey and Minnie.


Only eight days 'till Christmas. But who's counting?

Friday, December 7, 2012

How to Fix a ColecoVision Gaming Unit That Shows Weird Picture

by Kelly

We interrupt our regularly scheduled crafty post to bring you a special feature - old school video game repair.

Santa came to our house early and brought us the ColecoVision gaming system that my husband wanted when he was a kid. Only 29 years late, but hey, you can't have everything. Including, it seems, a working game system.

No Cartridge

With Cartridge

We tried to clean it (that's what the giant sized bottle of rubbing alcohol on the table is all about) to no avail. Luckily, through the magic of the Internet, the solution was less than a minute away.

We landed on Joomla!, which I had never heard of before, but it's a great site for those with a love of archaic game systems. And there was our solution - an easy, in depth tutorial, with pictures. Cheers, Callan, our faceless Internet adviser, and thanks for the help!

All you have to is change the power switch. Get out your solder braid or your handy dandy vacuum pump solder sucking system, if you have one. Ah, how I miss the high-tech soldering stations that I had access to at school.


Switch removed

You can repair the switch itself, if you're a traditionalist, but that requires disassembling the switch, cleaning the contacts, applying new dielectric grease, and reassembling said switch. Frankly, that seemed like a huge pain in the a**, so we chose to install a new switch.


Once you've done this minor repair, you can do the happy dance, when your system works like new:


So if you're in a similar situation with your ColecoVision, just visit Joomla!'s tutorial and in no time you'll be up and running. One tip on taking apart the ColecoVision: there are three case screws under the silver label on the front of the unit. If you're a patient person, and lucky, you should be able to peel up that label and reapply it with no problems. Don't take it all the way off, just lift each end until you find the screws, then stick it back down.

Sorry to go off topic, but I just had to share, and never fear, our next post will be about crafting. Or backyard birding. Or books. Probably.

Monday, December 3, 2012

The Sweater Project

by Kelly


The sweater project begins:


This is a project from the kit I Taught Myself Knitting, produced by Boye. Some people slam this kit because of the 'outdated' patterns, or because they found it difficult to learn from, or because the materials weren't adequate.  I personally would give this book 4 stars, and think it's a great resource for beginning knitters, provided you have access to YouTube. 

I freely confess that I learned how to knit by watching YouTube videos. It's cheaper than classes, easier than trying to decipher diagrams or drawings in a book, and you can consult YouTube in the middle of the night when a project has gone awry and you need a helping hand.

The Boye kit does provide great guidance in 'what's next'. It walks you through the process of learning to knit, and the projects in the book detail exactly what you need to know, with page numbers of the lessons.  For example, for the sweater I'm working on, I need to know lessons 1,2,3,4,7,8, 10, 14, and 16. In other words, I should be able to knit, purl, increase and decrease, knit to gauge, join yarn, and seam. If I can't, I probably shouldn't tackle this project yet.

Since I have never knit a sweater before, I needed a simple pattern that has been tested. I decided I would rather not learn from an online pattern that might be full of errors and typos, and would only confuse me further. I'm sure that I'll be plenty confused as is. And the Ravelry page (I heart you, Ravelry) doesn't have any errata for this pattern, so I'm hopeful that at least I'll be working from good instructions.

I can already say, though, after knitting three gauge swatches, that I don't think much of this Bernat yarn. It doesn't seem to wear very well in the washer, though it's advertised as 'machine washable'. I might end up hand washing this sweater, and it would have been nice to know this ahead of time. Still, we'll see what the finished product looks like.

Stay tuned for the next week or so, to see how it goes.

Friday, November 30, 2012

Awake with the Birds

by Kelly

Another potently pink sunrise.


In the photo it actually comes off as more mauve. Interesting.

Meanwhile, word has gotten around the neighborhood that I'm offering a free breakfast. Take a look at some of the visitors I've had over the last few days.


Our cat is a confirmed birdwatcher. He lurks under the Christmas tree, which is right by the patio door, so that he can watch unseen. Occasionally he meows in frustration when he sees a particularly tasty morsel fly off, stuffed with seeds or peanuts.

And speaking of Christmas trees, we've decided to put up the artificial one. Mostly because we had to go to our other house to get ornaments anyway, so if we used the artificial one, we wouldn't have to make another trip to get a tree. Chalk one up for laziness.


Of course, now it's time to unpack all the non-working light strings and get to work on repairing them. Sigh.

Monday, November 26, 2012

Pirate Dew Rag - Finished!

by Kelly

And here's the reveal of the finished project - A pirate dew rag for my husband's birthday:


I used this free pattern from sewing artistry. If you're handy with a sewing machine, you should definitely check them out. And even if you're like me, and regard a sewing machine as something just a little less tricky (and potentially dangerous) than a hand held plasma cutter, check them out anyway, because this dew rag pattern is perfect.

Donna makes the suggestion that you start sewing at the back (where the ties are located) and work your way forward, to ensure that everything lines up perfectly. Meanwhile, I would suggest that if you're cutting out a fabric pattern for the first time, don't choose the most slippery rayon fabric in the store. And get yourself a decent piece of white chalk, for heaven's sake...if you can find one, that is.

Donna also suggested that these would be perfect for kids who are undergoing chemo, and when I suggested this to my mom she concurred. She even said that she would have preferred one of these to the endless stream of headscarves, hats and sad looking wigs that we were offered when she was going through chemo. My mom in a pirate headscarf...see what I've missed by not being crafty, all these years?

Since I have no idea how to scale down sewing patterns, I'll leave that part to someone else, but I think any kid would love these, even if they haven't lost all their hair.

Especially in a pirate print. Arrrr.

Friday, November 23, 2012

The Sewing Project - Black Pirate Dew Rag

by Kelly

Today is Black Friday, which means I will be staying out of harm's way by avoiding retail storefronts until the shopping mania is over. I participated in one Black Friday, years ago, when I was getting off work at 6 AM and was already awake and functional for the biggest shopping event of the year. Never again. Or at least, not unarmed.

Crafting stores in general seem to be the exception to the Black Friday rule.They know their audience, and they understand that their demographic will be far too busy struggling in hand to hand combat over that last 'Tickle Me Elmo' doll to even think about their current crafting needs.

Speaking of crafting stores, when three of us here from Three Strands Together were in Joann's Fabric recently, we saw this must have fabric for my piratey husband:


The three of us all had the same thought - this fabric was made for my piratey husband. But what could I possibly do with it?

My husband is a biker, as in a motorcycle rider, so wooly scarves and, heaven forbid, mittens, aren't really his style, and that means that I have never made him a homemade gift. On the other hand, he does like to wear something under his helmet to prevent 'helmet hair', and that something is called a dew rag. Or DooRag. Or however the spelling is supposed to go.

So I went to a site called sewingartistry, and found a pattern to print out:


And then I found some black fabric to use as a liner for this somewhat transparent top fabric, and cut that out in the pattern shapes as well:


And now I'm off to Donna's house to tap into her sewing expertise, because frankly I don't have a clue how to go about this. More on that in an upcoming post.

Monday, November 19, 2012

Gingerbread Men Christmas Ornaments

by Kelly

Since we usually put up our Christmas tree right after Thanksgiving, I went back to a project I had put aside: small gingerbread men.


Of course, for the last couple of years we've used a live tree, so our Christmas decorating might be slightly delayed. Artificial trees can go up any time, but real ones don't age well, and I'm pretty soft-hearted, so that bugs me. I always feel a little twinge of sorrow when I'm vacuuming up loads of pine needles around the poor tree hacked down in its prime and dragged from its clean scented woodland home to suffer indignities of tinsel and garish lights in its dying days.

Anyway, back to the gingerbread men ornaments. These poor guys have suffered many crafting setbacks.


First, I couldn't get a nice outline with my chalk pencil. I have never had much luck with chalk pencils, and a long discussion with my mom has convinced me that I'm  not alone in my troubles. She showed me her large collection of unsatisfactory chalk bits and pieces, gathered over five decades of sewing, and said that she has never understood why she couldn't get the hang of drawing on fabric with the stuff. Maybe it's genetic. I eventually settled on using a black Sharpie instead. To heck with tradition, anyway.

My second problem with these ornaments was that I couldn't get the crisp fabric edge that I was looking for. The frayed linen edges made me pretty unhappy. I solved that problem with iron-on fusible webbing.

And then, for some reason, I had trouble with the embroidered faces. The early ones had 'creepy doll eyes syndrome', even though I wasn't using buttons. I may eventually specialize in creepy eyed dolls, since I seem to be able to produce them with very little effort.

At any rate, I'm pretty satisfied with them now. I think they'll look very nice on our Christmas tree. Which will actually come from a Christmas tree farm, by the way, and whoever owns that farm will be really grateful for an influx of cash so he can keep the lights on and put a turkey dinner on the table for his family.

There, that makes me feel better. First wave of Christmas guilt successfully battled!  'Tis the season.


Friday, November 16, 2012

Candy Dot Hat and Scarf

by Kelly

Now finished: the Candy Dot Hat and Scarf Set.


And the hat came out just a smidge smaller than I calculated, and by a smidge I mean less than 1/8 of an inch, so I'm really happy about that. I am now a Gauge Master! Ha, not really. But I'm making progress.

I'm going to try a few more pairs of gloves and then plunge into the sweater project. 


Monday, November 12, 2012

Hello Kitty Hat

by Kelly

Another hat finished for The Mitten Tree.


I used this free pattern from Crochet in Color. It's so much easier to crochet hats than to knit them. i did make one change, though - rather than braiding the pom pom ties, I made a knitted I-cord and then used the leftover end to tie around the pom-pom.

In other news, now that winter is officially here, I was given some pretty white vases.


These were a gift because, for some reason, there was actual dirt inside. But I patiently cleaned them out with the use of a chopstick, paper towels, and a pair of forceps. Forceps are extremely handy for grabbing things that are fragile, like soggy paper towel, or for holding impossibly tiny wires when you're trying to solder them onto a microscopic circuit board and don't have a full soldering station with vices and things. I'm sure they're useful for other things as well. You might say they're a real life saver.

And in another aside, my beloved husband and I are supposed to be on vacation right this very minute...but alas, finances won't allow that this year. However, in lieu of beautiful pictures from a beach that I should be uploading today, I did manage to find something similar locally.


Yesterday was so windy that the birds sitting on the water were being blown down river. Then they would fly back to where they started and be carried down stream again. It was hard to tell if they were having fun or irritated by this process. Who knows what birds think?

I know what I think. Brrrr! Winter has definitely arrived. Time to get back to learning how to knit gloves.

Friday, November 9, 2012

First Snowflakes

by Kelly

Searching for snowflakes, I found some unusual patterns:
via LionBrand

The best thing about Lion Brand patterns is that the Errata is written in red, so you can see what you're getting into. And this comes with matching mittens - very cute. This is a knitting pattern, but never fear, the next one is crochet.


via So Far, So Good

I love this beautiful snowflake, even if it is a doily. And the best part is, she recreated this from a cast off doily she found in a thrift store. Free pattern available at her site, and while you're there, check out her Walled Garden Square, dug out of an old folder. I'm glad I'm not the only one with a library of paper patterns with no provenance.

Meanwhile, I took a quick break from gloves to make a few hats, including the candy dot one that I finally finished.


Oh well, break's over. Back to gloves!
Related Posts Plugin for WordPress, Blogger...