by Kelly
New projects - baby blankets to sell.
The bottom blanket is supposed to have ribbon threaded through those eyelets and then tied in a bow. Now if only I had some ribbon.
Also, I've been experimenting with edgings and came up with my very own lace pattern (yay!).
I originally made it up when I was trying to make an edging for another baby blanket that I haven't finished yet, but I don't think this trim is going to work for that. I'd always be afraid of little fingers and toes getting caught in all the lacy holes.
It curls up like that because it's basically a lace ruffle. When stretched out flat it looks even curvier.
I'm selling the edging in the shop here.
And here's the latest project - a shawl that's been a quick crochet so far...
The free pattern for this shawl (called Iris) is at WEBS if you're interested.
The best part is that it's only a two row pattern, which for lace is really amazing. No need for a lifeline here.
Friday, May 18, 2012
Monday, May 14, 2012
Adding a Backing to a Cross-Stitch Bookmark - Tutorial
by Kelly
When I started making cross-stitch bookmarks, I faced a dilemma. As a book lover, I didn't want a bookmark that was too thick, because then it might damage the spine of the book. On the other hand, the stitched bookmark really needed some kind of backing, to cover up the less than pretty back.
After trying quite a few methods, I finally found one that works - adding a ribbon back with double stick fusible webbing. It's super fast and easy and all you need is the bookmark, the webbing, some ribbon, and an iron.
First, set your iron to the heat setting recommended on the webbing package. While that's warming up, cut your bookmark, your ribbon, and a piece of the webbing to an identical size.
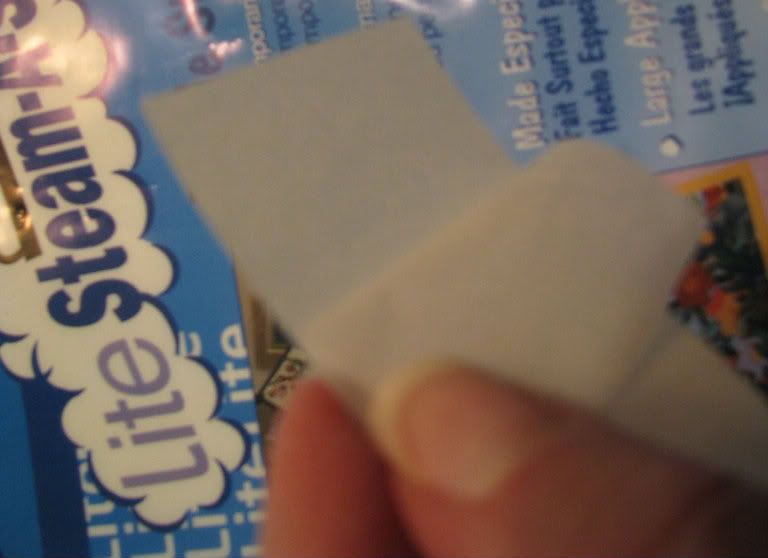
Next, peel off one layer of backing from the webbing. This will expose a layer of sticky stuff.
Place the backing, sticky side down, onto your bookmark and iron lightly. I usually just set the hot iron on the bookmark for a count of four, then lift it off. By the way, if you don't happen to have an ironing board, two layers of bath towels on the kitchen counter works just fine. (At least, for solid surface counter tops.)
Peel the next layer off of the backing. Look, another layer of sticky stuff.
You'll notice that I have two 'seam allowance' side flaps on the bookmark above. This probably isn't necessary - I just like to be sure that the side edges are as sturdy as possible, since they seem to wear out first.
Place the ribbon on the bookmark, making sure the edges are lined up the way you want them, because after the next step, there's no going back.
Now iron again - you'll need to iron a little longer this time, to make sure all those layers are fully adhered.
That's it! You're done.
Looks like I'm going to have to trim that ribbon a little. But that's okay - I don't have to worry about fraying edges, because the webbing acts like glue and holds loose threads together.
Ta-da! All done. Less trouble then sewing, and not as thick or messy as gluing on a piece of felt. And there are miles and miles of pretty ribbon at the craft store, so they're sure to have one that matches your stitching.
If you make a mistake with your first experiments with fusible webbing, don't freak out. Soak your project in lukewarm water for a few minutes, then use your fingernail or a soft toothbrush to gently scrub away the fusible webbing. Please be aware that I have never tried this with old projects, only new ones, or projects a few days old. I found this out by accident when I tried to clean a completed bookmark.
If you get sticky stuff on your teflon coated iron, let the iron cool and use vinegar and a soft toothbrush to clean it. I got that tip here. Vinegar is cheap and does so many things...I hope nobody gets a patent on the stuff, or we'll be paying an arm and a leg for it.
I've added some bookmarks to the shop. Give them a look here, if you have a second.
When I started making cross-stitch bookmarks, I faced a dilemma. As a book lover, I didn't want a bookmark that was too thick, because then it might damage the spine of the book. On the other hand, the stitched bookmark really needed some kind of backing, to cover up the less than pretty back.
After trying quite a few methods, I finally found one that works - adding a ribbon back with double stick fusible webbing. It's super fast and easy and all you need is the bookmark, the webbing, some ribbon, and an iron.
First, set your iron to the heat setting recommended on the webbing package. While that's warming up, cut your bookmark, your ribbon, and a piece of the webbing to an identical size.
Next, peel off one layer of backing from the webbing. This will expose a layer of sticky stuff.
Place the backing, sticky side down, onto your bookmark and iron lightly. I usually just set the hot iron on the bookmark for a count of four, then lift it off. By the way, if you don't happen to have an ironing board, two layers of bath towels on the kitchen counter works just fine. (At least, for solid surface counter tops.)
Peel the next layer off of the backing. Look, another layer of sticky stuff.
You'll notice that I have two 'seam allowance' side flaps on the bookmark above. This probably isn't necessary - I just like to be sure that the side edges are as sturdy as possible, since they seem to wear out first.
Place the ribbon on the bookmark, making sure the edges are lined up the way you want them, because after the next step, there's no going back.
Now iron again - you'll need to iron a little longer this time, to make sure all those layers are fully adhered.
That's it! You're done.
Looks like I'm going to have to trim that ribbon a little. But that's okay - I don't have to worry about fraying edges, because the webbing acts like glue and holds loose threads together.
Ta-da! All done. Less trouble then sewing, and not as thick or messy as gluing on a piece of felt. And there are miles and miles of pretty ribbon at the craft store, so they're sure to have one that matches your stitching.
Oh, and if you are mistake prone like me, here are a few helpful tips to get you out of the mess...
How to remove fusible webbing
If you make a mistake with your first experiments with fusible webbing, don't freak out. Soak your project in lukewarm water for a few minutes, then use your fingernail or a soft toothbrush to gently scrub away the fusible webbing. Please be aware that I have never tried this with old projects, only new ones, or projects a few days old. I found this out by accident when I tried to clean a completed bookmark.
If you get sticky stuff on your teflon coated iron, let the iron cool and use vinegar and a soft toothbrush to clean it. I got that tip here. Vinegar is cheap and does so many things...I hope nobody gets a patent on the stuff, or we'll be paying an arm and a leg for it.
I've added some bookmarks to the shop. Give them a look here, if you have a second.
Friday, May 11, 2012
How to Make the Most of a Garage Sale
by Kelly
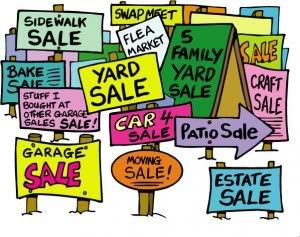
So garage sales season is upon us again. I have seen any number of articles on how to improve sales, but usually I skim right by them. Until, that is, I had my own garage sale, and lackluster sales convinced me that I was doing something wrong.
So here are a few of the more interesting/outrageous guidelines that I have seen, which may help you whether you're selling or buying.
1. When haggling, have your cash in your hand before you begin.
Apparently, seeing and touching money releases endorphins, and that just might tip the balance in your favor in a totally subconscious way.
my suggestion: Next time you're going to bring up a troublesome topic with your spouse, haul out the cash. They won't suspect a thing.
2. Play classical music at your sale.
Classical music makes people feel more affluent, so they will spend more.
my suggestion: avoid opera unless you're trying to sell a Valkyrie helmet.
3. Place the good stuff on the right.
Retail stores spend millions designing floor plans to maximize sales. Cash in on their research dollars by doing things the way they do. Their top secret trick? Arranging things to suit the millions of right-handed people in the world.
my suggestion: Alternately, give up on having garage sales and convince a retail store that you are a feng shui guru. If that fails, offer classes on how to maximize the flow of chi through a yard and garage.
4. Appeal to men.
A couple is going somewhere else, but they see your sign. The guy will agree to stop if he sees something manly (grills, power tools, chain saws) at your sale.
my suggestion : Grill food out in front of the sale and sell hamburgers and hot dogs as well. Searching for bargains is hungry work, and men are drawn to grills like flies to honey.
5. Moving displays sell more.
Sometimes up to 317% more. (Such an exact number...there must be science involved...) Put that old record player to use by putting a jewelry stand on top of it.
my suggestion: Have your kid or spouse help with this one - teach him/her to juggle and have them perform (with non-fragile merchandise) out in front of the sale. Give them a hat to put on the ground for the obligatory 'performance art tip'. If it's a really slow sales day, set one of the juggling items on fire. Make sure the burning item isn't something valuable (see number 6 below).
6. Google it.
Not sure if that game unit is really a bargain? Send a text to Google at 466453 with the item's make and model and the words 'price' and 'used'. You'll get a list of current prices.
my suggestion for sellers: Google everything in your sale before you price it. That old Valkyrie helmet might be worth serious cash. And why do you have a Valkyrie helmet, anyway? Never mind, I probably don't want to know.
7. Don't accept tattoos in lieu of cash.
At my sale, someone offered to tattoo me in exchange for a weight lifting set. (Yes, this is a true story. No, it's not because I live in a disreputable neighborhood. Sadly, this wasn't the strangest thing that happened at my sale.) I passed on the offer for many reasons, but mostly because the exchange rate was too difficult to figure out and I dislike haggling. That's the main problem with having a garage sale - right around the afternoon of day two, you get so tired of looking at your old stuff, and so desperate to get rid of it, that you will happily accept live chickens or monopoly money as barter if your customer doesn't have enough cash.
I hope those tips are helpful. And here's one more, just to make it an even number - for a current list of garage sales in your area, go to garagesalefinder.com. Ha! I worked a link in here after all!
| via Saving to be Rich |
So garage sales season is upon us again. I have seen any number of articles on how to improve sales, but usually I skim right by them. Until, that is, I had my own garage sale, and lackluster sales convinced me that I was doing something wrong.
So here are a few of the more interesting/outrageous guidelines that I have seen, which may help you whether you're selling or buying.
1. When haggling, have your cash in your hand before you begin.
Apparently, seeing and touching money releases endorphins, and that just might tip the balance in your favor in a totally subconscious way.
my suggestion: Next time you're going to bring up a troublesome topic with your spouse, haul out the cash. They won't suspect a thing.
2. Play classical music at your sale.
Classical music makes people feel more affluent, so they will spend more.
my suggestion: avoid opera unless you're trying to sell a Valkyrie helmet.
3. Place the good stuff on the right.
Retail stores spend millions designing floor plans to maximize sales. Cash in on their research dollars by doing things the way they do. Their top secret trick? Arranging things to suit the millions of right-handed people in the world.
my suggestion: Alternately, give up on having garage sales and convince a retail store that you are a feng shui guru. If that fails, offer classes on how to maximize the flow of chi through a yard and garage.
4. Appeal to men.
A couple is going somewhere else, but they see your sign. The guy will agree to stop if he sees something manly (grills, power tools, chain saws) at your sale.
my suggestion : Grill food out in front of the sale and sell hamburgers and hot dogs as well. Searching for bargains is hungry work, and men are drawn to grills like flies to honey.
5. Moving displays sell more.
Sometimes up to 317% more. (Such an exact number...there must be science involved...) Put that old record player to use by putting a jewelry stand on top of it.
my suggestion: Have your kid or spouse help with this one - teach him/her to juggle and have them perform (with non-fragile merchandise) out in front of the sale. Give them a hat to put on the ground for the obligatory 'performance art tip'. If it's a really slow sales day, set one of the juggling items on fire. Make sure the burning item isn't something valuable (see number 6 below).
6. Google it.
Not sure if that game unit is really a bargain? Send a text to Google at 466453 with the item's make and model and the words 'price' and 'used'. You'll get a list of current prices.
my suggestion for sellers: Google everything in your sale before you price it. That old Valkyrie helmet might be worth serious cash. And why do you have a Valkyrie helmet, anyway? Never mind, I probably don't want to know.
7. Don't accept tattoos in lieu of cash.
At my sale, someone offered to tattoo me in exchange for a weight lifting set. (Yes, this is a true story. No, it's not because I live in a disreputable neighborhood. Sadly, this wasn't the strangest thing that happened at my sale.) I passed on the offer for many reasons, but mostly because the exchange rate was too difficult to figure out and I dislike haggling. That's the main problem with having a garage sale - right around the afternoon of day two, you get so tired of looking at your old stuff, and so desperate to get rid of it, that you will happily accept live chickens or monopoly money as barter if your customer doesn't have enough cash.
I hope those tips are helpful. And here's one more, just to make it an even number - for a current list of garage sales in your area, go to garagesalefinder.com. Ha! I worked a link in here after all!
Monday, May 7, 2012
The Wish of One Thousand Paper Cranes
by Kelly
We've been in the process of trying to build a new house for some time now. This is taking much longer than expected, since it turns out that houses are mostly made of wood...or at least, paper.
Behold just a portion of the paperwork required. To the left are the house plans. To the right are the plat survey and site plan. On the bottom are the letters that we are required to mail to our neighbors to notify them that we are building a new house, as if they didn't know this already.
In the middle are the variances we are required to file because since the house currently on our property was built they have changed the zoning regulations. These forms had to be filled out in triplicate. And notarized.
We also had to file a copy of these variance forms with four local regulatory agencies (fire department, etc). These copies had to be sent certified mail (the receipts for that are the green slips in the center, and if you don't have all of those green slips, forget about filing your variance - that's how we got turned away last time).
Oh, and the CD's? Well, those contain a copy of the legal description of our property. Of course, they also wanted multiple paper copies of the legal description. I'm not quite sure why there has to be a CD version as well - I suspect these required bits of almost outmoded technology are the Land Use Office's version of a Great Leap Forward. Or maybe they're only trying to find a use for those mysterious white devices that take up so much room on their desks.
Have I mentioned that this variance process is going to cost us about $2,000.00? Pretty steep price to pay for correcting a problem we didn't even create, if you ask me.
So this is what I've been doing instead of crafting. Mind you, I had considered doing something creative, namely folding each paper in these documents into an origami crane before delivering them to the land use office, because the Japanese say that if you fold 1,000 origami cranes and then make a wish, your wish will come true. I used to think this saying was just a way for Japanese parents to keep their kids busy, but now I think this is actually an elegant analogy of the bureaucratic process that has become corrupted into a fable over time.
Maybe that's also why Japanese people use paper as a building material, as they figure they will just cut through the middle man. If it didn't rain so much around here, I might be tempted to do the same.
We've been in the process of trying to build a new house for some time now. This is taking much longer than expected, since it turns out that houses are mostly made of wood...or at least, paper.
Behold just a portion of the paperwork required. To the left are the house plans. To the right are the plat survey and site plan. On the bottom are the letters that we are required to mail to our neighbors to notify them that we are building a new house, as if they didn't know this already.
In the middle are the variances we are required to file because since the house currently on our property was built they have changed the zoning regulations. These forms had to be filled out in triplicate. And notarized.
We also had to file a copy of these variance forms with four local regulatory agencies (fire department, etc). These copies had to be sent certified mail (the receipts for that are the green slips in the center, and if you don't have all of those green slips, forget about filing your variance - that's how we got turned away last time).
Oh, and the CD's? Well, those contain a copy of the legal description of our property. Of course, they also wanted multiple paper copies of the legal description. I'm not quite sure why there has to be a CD version as well - I suspect these required bits of almost outmoded technology are the Land Use Office's version of a Great Leap Forward. Or maybe they're only trying to find a use for those mysterious white devices that take up so much room on their desks.
Have I mentioned that this variance process is going to cost us about $2,000.00? Pretty steep price to pay for correcting a problem we didn't even create, if you ask me.
So this is what I've been doing instead of crafting. Mind you, I had considered doing something creative, namely folding each paper in these documents into an origami crane before delivering them to the land use office, because the Japanese say that if you fold 1,000 origami cranes and then make a wish, your wish will come true. I used to think this saying was just a way for Japanese parents to keep their kids busy, but now I think this is actually an elegant analogy of the bureaucratic process that has become corrupted into a fable over time.
Maybe that's also why Japanese people use paper as a building material, as they figure they will just cut through the middle man. If it didn't rain so much around here, I might be tempted to do the same.
Friday, May 4, 2012
Hexagon Revamp and Half Hexagon Basics
by Kelly
Half hexagons are actually not hard at all.
The trick is to realize that you can't just divide the hexagon in half, that is, make 3 pairs of 2 cluster stitches, because if you do, you're trying to crochet into side spaces that don't exist.
See where the pen is pointing in the picture above? When you make a half hexagon, the spaces between clusters are what you're trying to create, because that's what you're crocheting into on each round. If that still seems a little mind boggling, then just follow the pattern below, and it will make more sense.
I adapted the hexagon pattern from One Loop Short, and here's what I did:
Half hexagons are actually not hard at all.
The trick is to realize that you can't just divide the hexagon in half, that is, make 3 pairs of 2 cluster stitches, because if you do, you're trying to crochet into side spaces that don't exist.
See where the pen is pointing in the picture above? When you make a half hexagon, the spaces between clusters are what you're trying to create, because that's what you're crocheting into on each round. If that still seems a little mind boggling, then just follow the pattern below, and it will make more sense.
I adapted the hexagon pattern from One Loop Short, and here's what I did:
Half Hexagon Recipe
Special stitches Cl St = Cluster Stitch: YO and
pull a loop through ring, YO and pull through 2 loops on hook (3
times), YO and pull through all 4 loops on hook.
1. Ch. 5 and join with a sl. stitch to form a ring.
2. Ch. 3, dc in ring, *(Ch2, yo and pull a loop
through, [3 loops on hook], yo and pull through 2 loops [2 loops on
hook], yo and pull a loop through [4 loops on hook], yo and pull through
2 loops [3 loops on hook], yo and pull through all 3 loops on hook), repeat from * once more, then ch. 3 and dc into ring. End color.
3. Join new color, Ch. 3, dc into the first cluster, ch2, (yo and pull a loop through, yo and pull through 2 loops) twice, yo
and pull through all 3 loops, ch2, cl st in same space, ch2, work two cluster stitches in the next ch. 2 space, ch. 2, work one cluster in next space, then ch.3 and dc into the same space.
4. Join new color, Ch. 3, work 2 dc in same space. *(Work 3 dc in next space. In next space, work 3 dc, ch. 2, 3 dc). Repeat from * once more, then 3dc in next space, 3 dc in last space.
Finish off and weave in all those dangly ends.
If you try this and find a problem, please let me know in the comments and I'll correct the pattern. Hopefully it's okay, though.
Oh, and here's a picture of the finished afghan.
Now all I need is a border. (*Sigh*) It's always something, isn't it?
Monday, April 30, 2012
Flowers
by Kelly
We interrupt our regularly scheduled crafting post to bring you flowers.
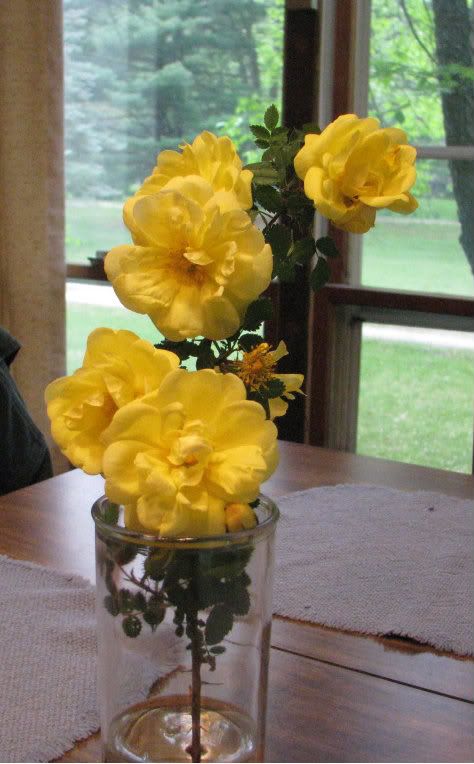
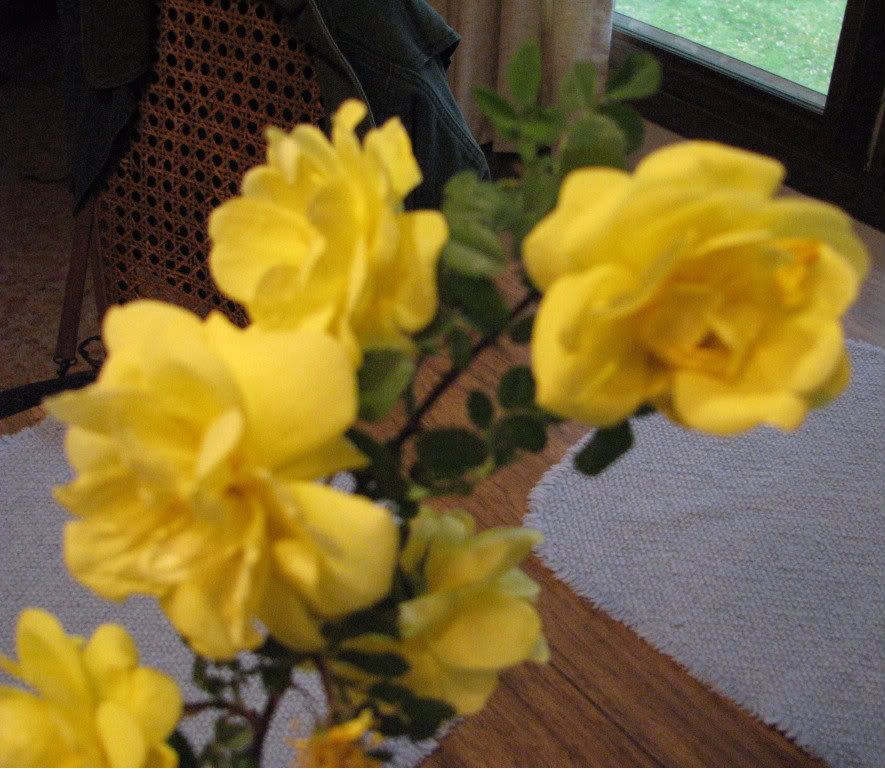
These are the roses that grow in our front yard. The rose bush was given to us by my husband's uncle, a gardening fiend who also gave us two white concrete birdbaths and a small boulder that he was trying to get rid of.
Why did we accept the boulder? Well, because it was free, and I really didn't have much time to think about it. One day I heard a knock on the door, and when I opened it, there was my new FIL, wearing his impatient 'I'm about to do something rash' look, and he asked me "Do you want a boulder for your garden?" Naturally, I said yes. I've never been good under pressure.
Sometime I will have to share the story about how I acquired a whole flatbed trailer full of books at an auction for $2. It was the same kind of high pressure situation. Regardless, though, I think I would have said yes to the boulder just because of the magic words 'for your garden'.
Meanwhile, back to the roses. These are old roses, the kind that only bloom once a year, and they smell heavenly. I wish I could somehow add the scent to this post.
I've never had much luck with the new hybrid tea roses, but I can grow old roses like crazy. My husband says that it's because they tend to be thorny and difficult to live with, much like me. And then, just when I'm about to give him my best thorny look, he adds, 'and beautiful'.
Which, ha, isn't true, but it's a great line, isn't it?
We interrupt our regularly scheduled crafting post to bring you flowers.
These are the roses that grow in our front yard. The rose bush was given to us by my husband's uncle, a gardening fiend who also gave us two white concrete birdbaths and a small boulder that he was trying to get rid of.
Why did we accept the boulder? Well, because it was free, and I really didn't have much time to think about it. One day I heard a knock on the door, and when I opened it, there was my new FIL, wearing his impatient 'I'm about to do something rash' look, and he asked me "Do you want a boulder for your garden?" Naturally, I said yes. I've never been good under pressure.
Sometime I will have to share the story about how I acquired a whole flatbed trailer full of books at an auction for $2. It was the same kind of high pressure situation. Regardless, though, I think I would have said yes to the boulder just because of the magic words 'for your garden'.
Meanwhile, back to the roses. These are old roses, the kind that only bloom once a year, and they smell heavenly. I wish I could somehow add the scent to this post.
I've never had much luck with the new hybrid tea roses, but I can grow old roses like crazy. My husband says that it's because they tend to be thorny and difficult to live with, much like me. And then, just when I'm about to give him my best thorny look, he adds, 'and beautiful'.
Which, ha, isn't true, but it's a great line, isn't it?
Friday, April 27, 2012
Dimension's Cross Stitch Kit Review
by Kelly
All cross stitch kits have a few things in common - one or two embroidery needles, a graphed pattern to follow, a piece of fabric, and floss.
I usually choose kits from a company called Dimensions. Now, in general I don't have much brand loyalty - I tend to buy for different reasons. But for cross stitch kits, I always look at Dimensions first, and here's why.
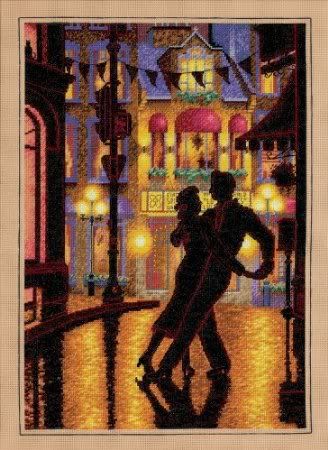
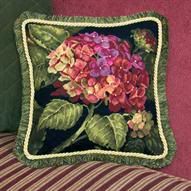
First of all, they chose beautiful images to turn into kits. Here are two of my favorites:
Secondly, their kits are never boring to work. Now, having said that, if the idea of sewing hundreds or thousands of tiny colored x's onto a piece of fabric to make an image makes you shudder, these kits still aren't for you.
But if you're crazy like me, and find that kind of thing fun and worthwhile, then imagine combining different colors of floss together in your needle to get a unique variegated look, or learning how to make velvety dark shadows with four strands of black floss, or adding French knots and lazy daisy stitches onto a cross stitched background to create a patch of flowers.
Also, they're great quality for the money. I've completed somewhere between ten or fifteen of these kits, and I've never been disappointed. I've also never run out of floss, which is a good thing, because they dye their own. If you do run out, they provide a way to order more of that color. Of course then there might be problems with dye-lots, and that could be a huge issue if you're trying to finish a half completed kit. Luckily, I've always had floss left over when I'm finished.
And lastly, since they have kits for all levels, from beginner to expert, as I learned new things I've always been able to find a Dimensions kit that was interesting and challenging. Whether or not I will ever take on one of their really complicated kits (like Ballerina Dreams), that's another story.
For now, I'm back to crocheting. But that smaller kit below would be cute to gift to my mom, since she loves butterflies. Hmm....
All cross stitch kits have a few things in common - one or two embroidery needles, a graphed pattern to follow, a piece of fabric, and floss.
I usually choose kits from a company called Dimensions. Now, in general I don't have much brand loyalty - I tend to buy for different reasons. But for cross stitch kits, I always look at Dimensions first, and here's why.
First of all, they chose beautiful images to turn into kits. Here are two of my favorites:
| Midnight Dance via Amazon |
| via Dimensions site |
Secondly, their kits are never boring to work. Now, having said that, if the idea of sewing hundreds or thousands of tiny colored x's onto a piece of fabric to make an image makes you shudder, these kits still aren't for you.
But if you're crazy like me, and find that kind of thing fun and worthwhile, then imagine combining different colors of floss together in your needle to get a unique variegated look, or learning how to make velvety dark shadows with four strands of black floss, or adding French knots and lazy daisy stitches onto a cross stitched background to create a patch of flowers.
Also, they're great quality for the money. I've completed somewhere between ten or fifteen of these kits, and I've never been disappointed. I've also never run out of floss, which is a good thing, because they dye their own. If you do run out, they provide a way to order more of that color. Of course then there might be problems with dye-lots, and that could be a huge issue if you're trying to finish a half completed kit. Luckily, I've always had floss left over when I'm finished.
And lastly, since they have kits for all levels, from beginner to expert, as I learned new things I've always been able to find a Dimensions kit that was interesting and challenging. Whether or not I will ever take on one of their really complicated kits (like Ballerina Dreams), that's another story.
For now, I'm back to crocheting. But that smaller kit below would be cute to gift to my mom, since she loves butterflies. Hmm....
| via Dimensions site |
Subscribe to:
Posts (Atom)